| Author | Message | ||
| carl white (Carl_mci_9)
Registered Member Username: Carl_mci_9 Post Number: 10 Registered: 1-2007 Posted From: 24.154.148.105 Rating: N/A |
I made a mistake and placed this on the flea market. I have finally got a rebuilt transmission for 79 mci 9. It is a 740 automatic like it has now. It will go behind a 8v 71 non turbo. My questions are how have you replaced yours? Did you pull the engine and transmission out together or just dropped the transmission and let the engine stay in the bus? Any tricks and information would be greatly apreciated. thanks carl | ||
| JR Lynch (Njt5047)
Registered Member Username: Njt5047 Post Number: 137 Registered: 7-2006 Posted From: 69.132.226.200 Rating: N/A |
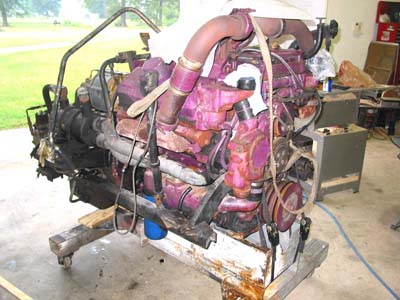
Pull the cradle with the engine and trans assembled. No special tricks to it...other than the flexplate bolts are hidden behind a pipe plug above the starter flange. I've had my HT748 out and replaced the engine rear main seal. It isn't complicated, if you have a modicum of mechanic experience. You'll have to build or buy some device (dolly?)to support the cradle for removal. MCI manual has plans for a dolly that will work for trans exchange. The engine will sit on the dolly allowing the trans to be removed. No other engine stands are necessary for that operation. Tag any wiring that you remove...plug the fuel lines. The cooling system holds about 10 gallons between both rads and engine. Turn off the gate valves to isolate the coach heat system from the engine. Use lots of PB Blaster on the exhaust hardware. Help removing same without breaking anything. Best, JR  | ||
| JR Lynch (Njt5047)
Registered Member Username: Njt5047 Post Number: 138 Registered: 7-2006 Posted From: 69.132.226.200 Rating: |
I should have included the fact that no jacking is required beyond what is necessary to remove the crossmember (very lightweight) and driveshaft (not lightweight). Air suspension is used to raise the bus to roll the dolly under the engine, and then lower it onto the dolly so that the cradle just clears the frame. You'll need to plug the compressor air supply line once disconnected so that shop air can be attached to the coach. Bleeding (dumping at any tank or drain) will lower the bus. Allow both front and rear to raise and lower so the bus isn't tilted front to rear. Engine removal is best done on a smooth floor. You may get around this...if you have a large forklift, with a minimal frame on the forks, the engine could easily be pulled. If you decide to do this yourself, be careful with the engine on a dolly...it's about heavy, and will hurt if you manage to get between any part of the powertrain and bus. Pmail (or post here) if you have any specific questions. Be very careful when working under the bus...block per the manual. Never crawl under an aired up bus without blocking the body and chocking the wheels. Never unhook an airline with air on the system. Be careful working near the DD3 pots as they will set when air leaks down to around 70 lbs. If you don't have a chassis manual, that should be one of your first purchases. If you reuse your transmission oil cooler, clean it out first. Be careful with the driveshaft too...it's heavy. The flange will have to be pried forward to remove, and it will come down suddenly. It's a lot of work, but not demanding. Just like working on a huge car engine. You'll have to bleed both the coolant system and fuel injector/lines once the engine is back in place and ready to run. Bleed injectors and pump at the secondary filter fittings. Coolant bleeds at cock on thermostat crossover tube. Hope you have a fuel primer pump on your coach...if not, time to install one! Sorry about the "book," JR |