| Author | Message | ||
| Douglas Tappan (Dougthebonifiedbusnut)
Registered Member Username: Dougthebonifiedbusnut Post Number: 59 Registered: 10-2004 Posted From: 75.69.223.64  Rating: N/A |
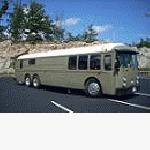
Evening "Best and Brightest" Another milesstone in the building of my beloved Crown. Took her to Lake George for vacation and got many praises for the new paint job. All I did though was to put a coat of self etching primer on her - What a differance. The biggest plus is that my wife is beginning to take interest, That is really cool. She told me she wanted the bathrom done first, couldn't agree more so the first thing I need is the showerstall.It's diffucult finding offsize shower stalls.Can anyone help me out? | ||
| RJ Long (Rjlong)
Registered Member Username: Rjlong Post Number: 1416 Registered: 12-2000 Posted From: 67.181.166.160  Rating: N/A |
Doug - We'd love to help you out. . . which way did you come in?? (Sorry, I know it's a terribly bad joke, and has been around forever, but I just couldn't help myself!) With that awful humor out of the way, let me share that it seems many busnuts end up fabricating a shower unit, because so many of the ones found at the big box stores won't fit. They start with a shower floor pan by itself, and then build walls around it. FRP is often the material of choice for the walls, but I've also seen plain old linoleum used, too. Biggest challenge with this method is making sure it's completely sealed. Others have taken the molded units and modified the top to match the curvature of the roofline - again making sure everything's sealed well. With your Crown, you've also got the challenge of the mid-ship engine to work around. Not insurmountable, obviously, just more of a challenge. FWIW & HTH. . . bad joke and all!  | ||
| FAST FRED (Fast_fred)
Registered Member Username: Fast_fred Post Number: 450 Registered: 10-2006 Posted From: 208.100.193.231 Rating: N/A |
The nicest I have seen (and easiest to maintain) have a SS liner simply glued to the inside with formica glue . My technique was to create a box , a hanging locker with drawers that fir INSIDE the shower space. By unlatching 4 catches the box slides out on 3 HD slides into the center passage . The shower has a track and curtain to maintain water tight over the store bought pan, while in use. Works for me , and huge empty space of a shower stall that get used 5 min a day , is no longer a problem. Think in 3D for the best interior FF | ||
| Jack Conrad (Jackconrad)
Registered Member Username: Jackconrad Post Number: 817 Registered: 12-2000 Posted From: 76.3.173.51 Rating: N/A |
We made our shower by first building the walls out of 3/4" oak plywood. The entire inside (walls & floor) was then fiberglassed using mat and resin, similar to fiberglassing a wooden boat. Fiberglass was then covered with ceramic tile. This allowed us to build a nice looking shower to our exact dimensions. Just our way, YMMV With all the creative BusNuts out there, I am sure you will get many ideas to use or adapt to your needs. Jack | ||
| Ray Drummond (Ray_d)
Registered Member Username: Ray_d Post Number: 47 Registered: 4-2006 Posted From: 68.123.110.10 Rating: N/A |
Here is a link to some rv shower pans http://www.pplmotorhomes.com/parts/rv-pumps-water/rv-shower-pans.htm Ray D | ||
| R.C.Bishop (Chuckllb)
Registered Member Username: Chuckllb Post Number: 333 Registered: 7-2006 Posted From: 75.209.235.225 Rating: N/A |
Hey, Doug...looks like you have made some real progress...I like your side window treatment. We placed the shower in the space between the rear wheels on one side with large closets over the wheel wells on each side of the shower. Built up from top of the wheel well floor with 1/2 inch ply wood on three sides/covered with shower pan liner to waist high/ 2x2 ceramic tile on floor and sides to above "seat" height (made a corner seat also covered with ceramic))/ wall plastic bath panels on upper walls and ceiling. Standard adjustable shower with a "navy" shower head....lots of room for shoulders and fanny...smaller on the floor area due to the slope to the top of the wheel well platform. Placed a sump pump between the wheel well frame members (thanx, FF). Height could be a problem for taller folks, but i went down to the frame height so gained an inch and a half. Has served us well for 6 years+-. I have pics if you will email me. FWIW RCB | ||
| Douglas Tappan (Dougthebonifiedbusnut)
Registered Member Username: Dougthebonifiedbusnut Post Number: 61 Registered: 10-2004 Posted From: 75.69.223.64  Rating: N/A |
Thanks for the great info guys! Jack, what did you use to glue the tile and what did you use for grout | ||
| Ednj (Ednj)
Registered Member Username: Ednj Post Number: 200 Registered: 3-2003 Posted From: 67.85.237.82  Rating: N/A |
Doug, Looks real nice 1 color. Old post= http://www.busnut.com/bbs/messages/233/17884.html | ||
| don goldsmith (Bottomacher)
Registered Member Username: Bottomacher Post Number: 205 Registered: 12-2000 Posted From: 72.15.86.59 Rating: N/A |
What size shower pan are you looking for? | ||
| Jack Conrad (Jackconrad)
Registered Member Username: Jackconrad Post Number: 820 Registered: 12-2000 Posted From: 76.3.173.51 Rating: N/A |
Doug, I answered your email, but I will put the information here for anyone else that is interested. Before fiberglassing, I made the floor by first putting 4 pieces of 1" X 1" wood around the edge of the shower stall. I then cut 4 "pie shaped" pieces of 3/4" plywood for the floor. The 4 pieces of plywood were cut to that they came together at the pre-determined drain location. This gave us enough slope to insure proper draining. The entire shower walls (except the glass wall) and floor were then fiberglassed with several coats of mat and resin. After the fiberglass was thoroughly set up, I used a grinder to lightly scuff the surface for the adhesive/thinset to get a better bite. The floor tile was installed using thinset that was mixed with latex admixture instead of water. I used standard wall tile adhesive on the walls. On the floor I used sanded poly grout mixed with latex admixture. On the walls we used unsanded grout mixed with latex admixture. The floor tile are 12" x 12" sheets of 1" square tile. For a floor, smaller tile allow more grout lines=better traction, less likely to slip. Wall tiles are 4" x 6" tile. Only problems we have had in 8 years is a little of the grout cracking where the wall and ceiling meet. We replaced this grout with a color matching silicone caulk. Our shower stall was made to the specific dimensions of the area available. The shower ended up 34" x 37" Jack (Message edited by JackConrad on September 01, 2008) | ||
| Tom Christman (Tchristman)
Registered Member Username: Tchristman Post Number: 13 Registered: 1-2006 Posted From: 66.218.33.156 Rating: N/A |
I used a Kohler 36"x36" shower pan that has the drain in one corner since my transit slopes up at the shower. Then built the walls around it with 3/4" furniture grade plywood and glued Kemlite to the walls with white silicone in the cracks. Looks a little industrial, but has worked for 8 years. Good Luck, TomC | ||
| Bruce Henderson (Oonrahnjay)
Registered Member Username: Oonrahnjay Post Number: 268 Registered: 8-2004 Posted From: 4.88.105.13  Rating: N/A |
I'm working on plumbing planning now. Please let me get this right -- I had been thinking that I'd love to have a tile shower but I was afraid that tile would not stand up to road/vehicle vibration and loads. But it appears here that it *is possible* with the right foundation structure, the right preparation, the right bonding/grout, and the right tile, for it to work OK. Is this right? How "tricky" is it to get this right? Thanks, this appears to be good news. | ||
| Jack Conrad (Jackconrad)
Registered Member Username: Jackconrad Post Number: 830 Registered: 12-2000 Posted From: 76.3.173.51 Rating: N/A |
Very easy. I did purchase a tile saw at Harbor Freight (about $60)and talked to a few people at the place we purchased our tile. We purchased our tile, thinset, latex admixture and grout at a place that sells to local tile installers. In addition to doing our shower as described above , we installed 13" x 13" tile on our bathroom floor and step area. We covered the vanity & kitchen counter top/backsplash areas with tile. Only crack has been in the tile on the bottom step. Before setting this tile, we put bolts through the floor to attach our electric step. I think the weight & leverage on the electric step causes the bottom step to flex slightly. Using latex admixture instead of water when mixing thinset and grout allows it to stick better. Also smaller grout lines (1/4" or less) seem to be more crack resistant. There is a new plastic mesh stuff out now that can be attached to the wood floor before the thinset has allows a much better grip for the thinset. Email me if you want more information or photos. jconrad@rvbus.net Jack (Message edited by JackConrad on September 05, 2008) | ||
| Len Silva (Lsilva)
Registered Member Username: Lsilva Post Number: 187 Registered: 12-2000 Posted From: 71.99.25.84  Rating: N/A |
The only reason not to use tile is weight. You can very quickly add hundreds of pounds with tile and stone in your bus. |